Krita, a popular open-source painting tool, has evolved to include various AI-powered features. Among them are “samplers,” essential in generating AI art. A sampler helps the AI understand and interpret the image generation process, determining aspects like style, texture, and the final image quality. You can achieve unique results with different samplers, making them essential for those who want more control over AI-generated art.
In this article, we’ll follow a step-by-step guide on how to add more samplers to Krita AI generation tool. This article is intended for users familiar with Krita but new to using AI samplers.
Understanding Samplers and Their Role in AI Generation
Samplers in AI art tools determine how the AI interprets and processes input data to create an image. Different samplers yield different results. Some samplers produce smoother, softer images, while others give sharper, more detailed outputs. Here’s a basic rundown of how samplers impact the final image:
- Smoothness: Some samplers create smooth, clean images by minimizing noise.
- Texture: Other samplers focus on texture, adding more detailed surface features.
- Speed vs. Quality: Samplers may vary in how fast they render an image versus the output quality.
Adding more samplers gives you greater flexibility in choosing the one that best suits your artistic needs.
Preparing Krita for Adding New Samplers
Before adding new samplers, it’s essential to ensure that your version of Krita is compatible with AI generation tools. This feature is only available in recent versions, so it’s time to upgrade if you’re using an older version.

Steps to Check and Update Krita:
- Open Krita and go to Help > About Krita.
- Note the version number and compare it with the latest Krita website version.
- If there’s a newer version, download it from the website and follow the installation instructions.
Updating to the latest version will ensure you have all the latest features, bug fixes, and performance improvements, including support for AI tools and samplers.
Installing a Plugin for AI Samplers
Adding samplers in Krita often requires a plugin, as AI generation features are not natively supported in Krita itself. These plugins integrate AI tools into Krita, giving you access to various samplers and settings.
Standard Plugins for AI Image Generation in Krita:
- Krita Stable Diffusion Plugin: This plugin lets you use the Stable Diffusion model, a popular AI model for image generation, within Krita.
- Krita AI Plugin (Custom Models): This plugin supports models other than Stable Diffusion and may include more sampler options.
To install a plugin:
- Download the Plugin: Go to a trusted source like GitHub or Krita’s plugin community and download the plugin file. Make sure it’s compatible with your version of Krita.
- Install the Plugin:
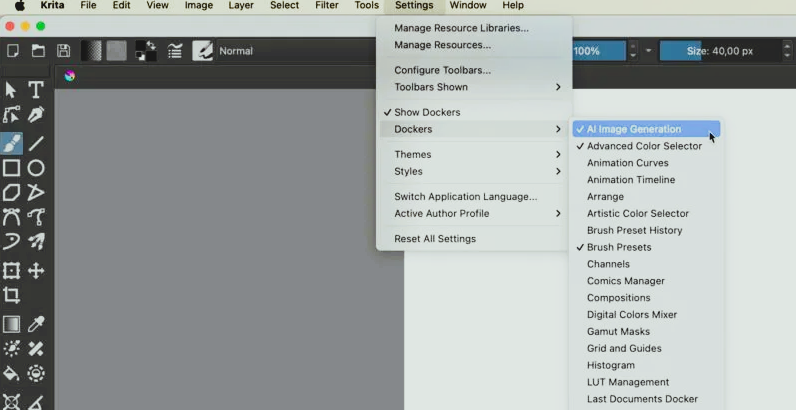
- In Krita, go to Settings > Configure Krita > Python Plugin Manager.
- Click Install from File and select the downloaded plugin.
- After installing, enable the plugin by checking the box next to its name.
- Restart Krita to ensure the plugin loads correctly.
- Adding and Managing Samplers in Krita
Once you’ve installed the plugin, you can access it in Krita and start using various samplers. Here’s how to locate the samplers and make the most of them.
Accessing Samplers:
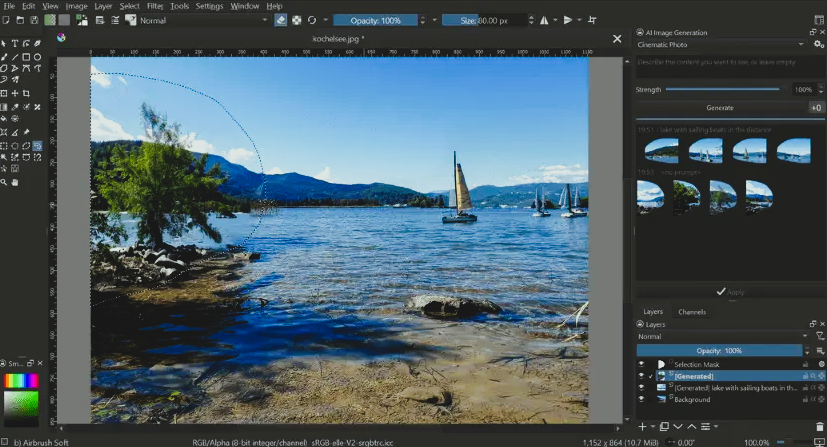
- Open the AI Tool Panel (this may vary depending on the plugin).
- Look for the Sampler section in the plugin interface. You should see a drop-down list of available samplers.
Choosing and Testing Samplers:
- Experiment: Start by selecting a sampler and generating an image to see how it affects the output.
- Compare: Try different samplers for the same input to get a feel for the styles and qualities each sampler produces.
- Adjust Settings: Many plugins offer additional settings for noise reduction, resolution, and style refinement, which you can use with the chosen sampler.
Each sampler might take a different amount of time to generate images, so consider performance and quality to find the one that best meets your needs.
Adding More Samplers from Other Models

If you want to expand beyond the samplers that come with your plugin, you can install additional models with unique sampler options. This may require more technical work but can lead to better, more customized results.
Steps to Add More Models:
- Locate a Model: Look for pre-trained AI models that include different samplers. These can often be found in online communities or repositories like Hugging Face or GitHub.
- Download and Integrate the Model:
- Download the model files and store them in a dedicated folder on your computer.
- Open the plugin’s settings and specify the path to the model folder.
- Restart Krita to apply the new models, which should now appear in the AI Tool Panel.
- Adjusting and Fine-Tuning Sampler Settings
How to add more Samplers to Krita AI generation Tool
After adding new samplers, you may want to fine-tune their settings to suit your artistic style. Here are a few options you can adjust within most AI plugins:
- Steps: This controls the number of steps the AI takes to generate the image. More steps often lead to finer details but take longer to render.
- Strength: This setting determines how strongly the AI applies the selected sampler’s effects. A lower strength might result in a more natural look, while a higher strength can add more stylization.
- Noise Level: This controls the level of randomization in the output. Reducing noise can make images cleaner while increasing it can add texture or abstract qualities.
Experiment with these settings for each sampler to understand how they affect the final image.
Saving and Managing Your Settings
Once you find a combination of samplers and settings you like, you may want to save these preferences for future projects. Here’s how:
- Create a New Preset: Most plugins allow you to save presets for different samplers and settings. Simply adjust the settings to your liking and save the configuration as a new preset.
- Organize by Style: Label each preset according to the type of effect or style it produces so you can easily select the right one when needed.
Saving your sampler settings can streamline your workflow and allow you to reproduce the same styles quickly.
Troubleshooting Common Issues

If you encounter any issues when adding or using new samplers, here are a few common fixes:
- Plugin Not Working: Try reinstalling the plugin or checking if it’s compatible with your Krita version.
- Slow Performance: Adjust the steps and resolution settings to speed up processing, especially on lower-powered devices.
- Model or Sampler Not Showing: Ensure the model path is correctly set in the plugin settings and restart Krita.
Conclusion
Adding more samplers to Krita’s AI generation tool opens new creative possibilities for digital artists. By following these steps, you can easily add, manage, and fine-tune samplers to achieve the unique look you want for your artwork. With time, you’ll become more familiar with the strengths of each sampler and develop a streamlined workflow that matches your style.


